


Showing posts with label baby. Show all posts
Showing posts with label baby. Show all posts
Thursday, August 06, 2015
Diaper Bag and Lots of Goodies


Sunday, May 26, 2013
Kwik Sew 3145
Time for some sewing for my grandson, he is getting so big and growing out of everything. I used Kwik Sew 3145
I used this fabric from The Fabric Fairy it is 100% poly microfiber recommended for board shorts, jackets, swim trunks and jacket linings. I thought it would be great for a summer pair of bib overalls, nice a cool but some protection from the sun.

I used the 3-6 month size and the pattern went together so smoothly.
I use to make lots of bib overalls for the twins from the time they were 3 until about 7. I knew the steps and was familiar with the construction but working with plaid was a new one.
I decided to cut out the main pattern pieces, matching the side seams. I also remembered something from the Great British Sewing Bee, May stated how important it was to keep the pattern the same down the center front. I tried to do this with the bib, the waistband and the pants

I have a marking pen which when ironed disappears, found it at my local quilt shop, Material Girl Quilt Shop, this came in quite handy to help me with the plaid matching. Once I was ready for a pocket piece, I placed that pocket pattern piece on the pants and marked the plaid pattern.


Next was following the pattern instructions, excellent, thank you Kwik Sew
Back view:

Back pockets, a bit hard to see, I omitted the plier pocket.

Now the front. The label is 13 years old at least. I was on this sewing list called Sew4Kids through quiltropolis and someone shared the link to this site in Australia, Lamington Labels. I bought several of these cute labels. Always thought it made the clothes look more RTW. I cannot find them online and wish I could. Anyone know a source for something like this?

Pockets, side snaps

The inside snaps, once again the KAM press is awesome!
 Had to put another label in these:

One thing make sure the straps measure 1-1/4" so the buckles will fit. I had to do some unsewing as my straps were too wide for the buckles.

I did have to put some fabric behind the buttons for the buckles. The fabric was just too thin and needed some thickness to support the buckles.
The little guy is growing like crazy, so I told Erin to put him in these quick, I want him to have a few wearings before they are too small.
Here is the little guy in the cars onsie - his mom said make the next size if you do more

 |
| source Kwiksew.com |
I used the 3-6 month size and the pattern went together so smoothly.
I use to make lots of bib overalls for the twins from the time they were 3 until about 7. I knew the steps and was familiar with the construction but working with plaid was a new one.
I decided to cut out the main pattern pieces, matching the side seams. I also remembered something from the Great British Sewing Bee, May stated how important it was to keep the pattern the same down the center front. I tried to do this with the bib, the waistband and the pants

I have a marking pen which when ironed disappears, found it at my local quilt shop, Material Girl Quilt Shop, this came in quite handy to help me with the plaid matching. Once I was ready for a pocket piece, I placed that pocket pattern piece on the pants and marked the plaid pattern.

Then I take that pattern piece, move it over to my fabric, line up the markings and cut out the pocket. After that, put the iron on the pattern piece and the lines disappear.
Here is the pocket during construction:

Back view:

Back pockets, a bit hard to see, I omitted the plier pocket.

Now the front. The label is 13 years old at least. I was on this sewing list called Sew4Kids through quiltropolis and someone shared the link to this site in Australia, Lamington Labels. I bought several of these cute labels. Always thought it made the clothes look more RTW. I cannot find them online and wish I could. Anyone know a source for something like this?

Pockets, side snaps


One thing make sure the straps measure 1-1/4" so the buckles will fit. I had to do some unsewing as my straps were too wide for the buckles.

I did have to put some fabric behind the buttons for the buckles. The fabric was just too thin and needed some thickness to support the buckles.
The little guy is growing like crazy, so I told Erin to put him in these quick, I want him to have a few wearings before they are too small.
Here is the little guy in the cars onsie - his mom said make the next size if you do more

Saturday, March 02, 2013
A New Sleeper
First all - Thank you so much for all the congratulations and kind words on the birth of this new little guy. He is such a sweetie and he has stolen my heart.
I used a preemie pattern I have had for years, I use to make them for Newborns in Need and donate to hospitals. The sizing was 2-3 pounds and 4-6 pounds. I tried to find the link but I get an error now. Here is a similar pattern and the smaller size and here is some sleepers for the preemie patterns at Pattern Review
Here is the little sleeper I made

My pattern is for a footed sleeper, I eliminated the feet, afraid the sleeper would be too short. I doubled the cuffs on the leg so Erin could roll them down for a bit more length if needed. I had this cute little patch and added it to the front. He might need a hat to match.
I have plans for a second one after I see how this one fits.
This was a fun project, he will have something that fits him now and it was the fraction of the price of RTW preemie outfits.
I do love my KAM snap press it made this sleeper quick and easy to make.
Sunday, February 24, 2013
Many Projects - One complete
Do you ever have one of those weekends, lots of time and lots of plans? That was me this weekend and here is my results.
First, I planned on finishing this Quilt from Modern Patchwork book. I did finish all the blocks but I ran out of background fabric. My progress

I was lucky and found one online source for my background fabric.
My next sewing project was going to be Vogue 8822
 made from a gorgeous Deep Turquoise Jersey from Mood Fabrics. Well, someone (to renamed nameless) looked at the layout sheet for the tunic instead of the dress resulting in not enough fabric. So more ordered and on the way, along with a gorgeous eyelet for Meredith a dress.
Next up a completed project, baby items for a quilting friend's baby shower next Sunday.

Burp cloth tutorial here
Diaper pouch pattern
Baby bib tutorial
Now I have a blouse cut out and heading down to sew.
Meredith did have success today, here is a quilt she made this weekend.
 This is her instagram photo.
I think there will be plenty more sewing time this week. Another winter storm on the way - 6 to 12 inches of snow Monday night and Tuesday. I will probably work Monday, then maybe Wednesday. I have a package from 2 packages from Mood Fabrics coming my way, hoping one will be here tomorrow!
First, I planned on finishing this Quilt from Modern Patchwork book. I did finish all the blocks but I ran out of background fabric. My progress

I was lucky and found one online source for my background fabric.
My next sewing project was going to be Vogue 8822
Next up a completed project, baby items for a quilting friend's baby shower next Sunday.

Burp cloth tutorial here
Diaper pouch pattern
Baby bib tutorial
Now I have a blouse cut out and heading down to sew.
Meredith did have success today, here is a quilt she made this weekend.

I think there will be plenty more sewing time this week. Another winter storm on the way - 6 to 12 inches of snow Monday night and Tuesday. I will probably work Monday, then maybe Wednesday. I have a package from 2 packages from Mood Fabrics coming my way, hoping one will be here tomorrow!
Sunday, December 30, 2012
Nursery
Here is a couple more items completed for my grandson’s nursery.
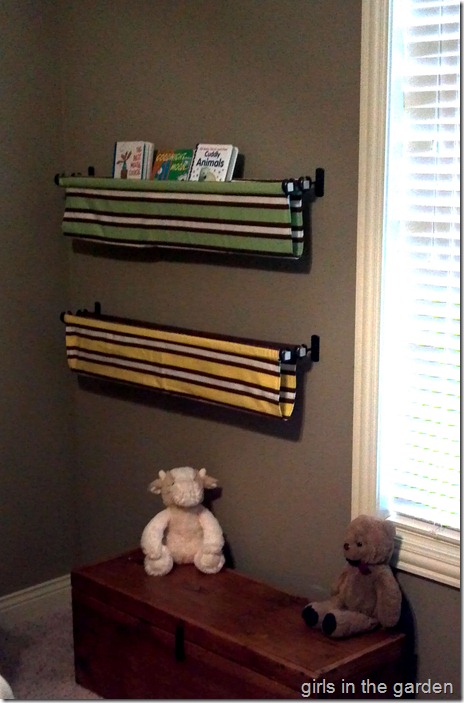
First the hanging book displays, made from this tutorial. My only change was to make the displays 35” wide, that was the wall space available in the nursery
The second item is the crib skirt made from a tutorial from Sew 4 Home.
Changes here are omitting the ties, which is an option in the pattern. Also, making the length shorter than their recommended cutting instructions. The pattern does state to carefully measure and add 1” for seam allowances. Erin and I measured 18” for the drop of the skirt. We measured incorrectly, I need to shorten the skirt by 2”. To do this I am going to take it from the top of the skirt. The top is attached to a platform piece and the panels are lined, I think shortening from the top will be the easiest.
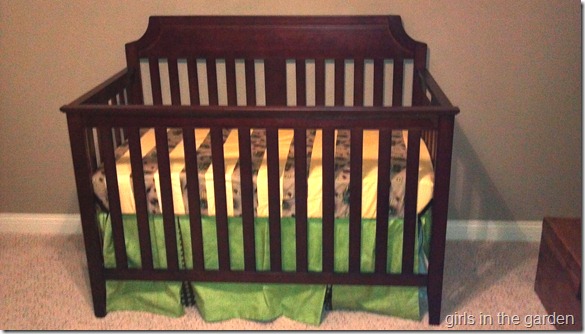
See it is just a little too long.
One more change, I did not add a panel to the back. The crib is always going to be against the wall and I did not want to use fabric for that. I did attach 3 pieces of ribbon, I thought it might need to be tied to the back and help with the weight from the front.
Tonight I finished a pillow for the rocker, we covered some canvases with fabric for some art on the walls and painted some letters for the canvas project.
All these pictures were taken with a phone. Once the nursery is totally complete, I will go in with my camera.
*******************************************************************************
Today was our Christmas with all our daughters and our two son-in-laws, it was the most wonderful day. I enjoyed the family time, the food and my cute new clothes. I am blessed with a wonderful family.
First the hanging book displays, made from this tutorial. My only change was to make the displays 35” wide, that was the wall space available in the nursery

The second item is the crib skirt made from a tutorial from Sew 4 Home.
Changes here are omitting the ties, which is an option in the pattern. Also, making the length shorter than their recommended cutting instructions. The pattern does state to carefully measure and add 1” for seam allowances. Erin and I measured 18” for the drop of the skirt. We measured incorrectly, I need to shorten the skirt by 2”. To do this I am going to take it from the top of the skirt. The top is attached to a platform piece and the panels are lined, I think shortening from the top will be the easiest.

See it is just a little too long.
One more change, I did not add a panel to the back. The crib is always going to be against the wall and I did not want to use fabric for that. I did attach 3 pieces of ribbon, I thought it might need to be tied to the back and help with the weight from the front.
Tonight I finished a pillow for the rocker, we covered some canvases with fabric for some art on the walls and painted some letters for the canvas project.
All these pictures were taken with a phone. Once the nursery is totally complete, I will go in with my camera.
*******************************************************************************
Today was our Christmas with all our daughters and our two son-in-laws, it was the most wonderful day. I enjoyed the family time, the food and my cute new clothes. I am blessed with a wonderful family.
Thursday, December 27, 2012
Crib Sheets
My little grandson will be here before we know it and Erin is taking advantage the Christmas break from teaching to get the nursery in order. That means Grandma, Nana or Nanny, or who knows what my name will be, needed to get busy. I went to work on crib sheets.
Using this Tutorial from Sew 4 Home to make the crib sheets. There is only one problem with this tutorial, the fabric requirements are 45” wide. Most quilting cottons don’t come 45” wide anymore. Instead of turning the edges 3/8” then another 3/8” under, I serged the raw edges and turned the 3/8” only once. This saved 3/4” of an inch (approximately).
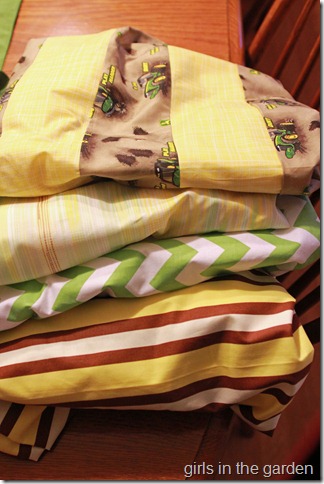
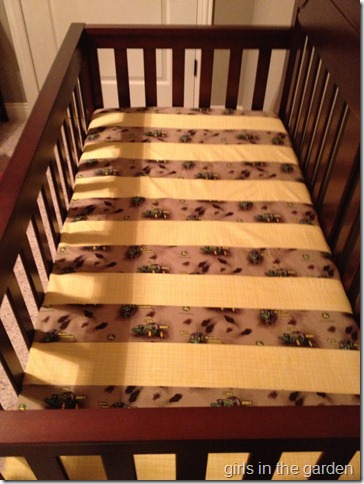
I made four over the last 2 days, one is pieced with strips of yellow and a cute John Deere print. The nursery is browns, greens and yellows, with a touch of John Deere items.
Here is the stack, folded terribly, I never have mastered fitted sheet folding
Here is the pieced one in place:
A pillow, the book slings, a crib skirt and Meredith needs to finish his quilt, then the nursery sewing is complet.
Using this Tutorial from Sew 4 Home to make the crib sheets. There is only one problem with this tutorial, the fabric requirements are 45” wide. Most quilting cottons don’t come 45” wide anymore. Instead of turning the edges 3/8” then another 3/8” under, I serged the raw edges and turned the 3/8” only once. This saved 3/4” of an inch (approximately).
I made four over the last 2 days, one is pieced with strips of yellow and a cute John Deere print. The nursery is browns, greens and yellows, with a touch of John Deere items.
Here is the stack, folded terribly, I never have mastered fitted sheet folding

Here is the pieced one in place:

A pillow, the book slings, a crib skirt and Meredith needs to finish his quilt, then the nursery sewing is complet.
Aqua Baby Quilt
Here is the second baby quilt, made for a present when needed. I found the pattern online and here is the tutorial
I purchased this charm pack with a couple of my quilting buddies, we like to go to new stores and this was our first trip to this particular store. I was drawn to the unusual color combination and thought how fun for a little girl, not the traditional pink.

I purchased this charm pack with a couple of my quilting buddies, we like to go to new stores and this was our first trip to this particular store. I was drawn to the unusual color combination and thought how fun for a little girl, not the traditional pink.

Saturday, November 10, 2012
Another Baby t-shirt
Here is another cute little shirt from Ottobre. It was suppose to be more of a onsie with the snaps but I put the snaps on the knit instead of the ribbing part. The first pull of the snap put a hole right through the thin knit.
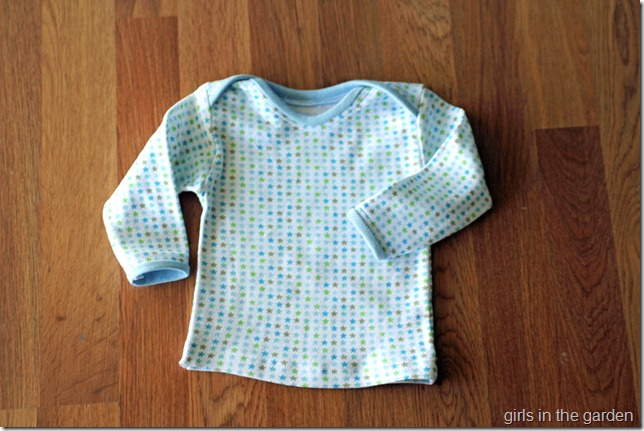
I have a couple of boy knits coming from Needle Nook Fabrics but would like to find some like the Ottobre Magazine. Any suggestions?

I have a couple of boy knits coming from Needle Nook Fabrics but would like to find some like the Ottobre Magazine. Any suggestions?
Wednesday, August 15, 2012
Future Sewing
We found out some very exciting news on Monday evening and with the news I will be pulling out this book and using it again after 17 years.
.jpg)
A grandbaby is on the way! Erin and Chris are the parents-to-be and the baby will be here Mid-March.
Here is the chalkboard Meredith made them for a picture. ( I have erased the name for privacy)

Probably time to start subscribing to Ottobre again!
Those of you who sew for babies, please share with me all the good fabric sites, patterns and anything else I might need to purchase!
I am so excited and the end of October we will find out boy or girl. Then the sewing will really begin.
As my good friend, Lynne, pointed out. There will be somethings to sew for the mom-to-be. Oh, the possibilities!
Subscribe to:
Posts (Atom)