Sunday, November 23, 2008

UFO


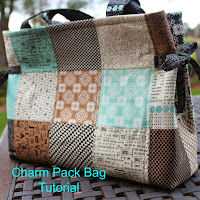
No, I didn't see one, I finished one. I had this purse cut out for 6 months and decided to get it off the shelf. I bought these polka dot handles a couple of months ago and thought they would be perfect with the design.


Also, to answer a question from Rachel: Is it usually the bigger Joann's etc stores that have these sweater knits?
I found my sweater knit at the local Joann's and mine is not an ETC, just a small not so nice Joann's! I found it in with the poly knits, so your store might not know they are sweater knits only as knits. HTH

Saturday, November 22, 2008

Amy Butler - Weekender Bag


Pattern Review
Pattern: Amy Butler’s Weekender Travel Bag
Description: The perfect carry-all bag for your next getaway!

Sizing: One size

Instructions: The instructions are very good with concise steps to finish this bag. Check out some updates for this pattern at Amy Butler's website These are mainly for the substitution of Peltex during the absence of Timtex. Sounds like a soap opera! One person is missing and the other is stepping in for the limelight.

Likes/Dislikes: I love the look of this bag, it is the second one I have made. The first was over 2 years ago and the results weren’t as nice. I have learned more patience.


Changes: Let’s see, a couple of changes that were a direct result from making the Sophia first. I used 2 layers of SF-101 interfacing on all the outside fabric layers (quilting cotton weight). If you were using home dec fabric, one layer would be plenty. I think that is in the updated instruction.

I used the Peltex on the main panel and pocket. On the bottom, I did not use the Peltex while sewing it onto the main panel and sides. Instead, I cut 2 layers of Peltex the size of the finished bottom and used spray adhesive to hold them together. I place this double layer in the bottom of the outside of the Weekender (before the lining). Purse feet were inserted into the bottom of the bag, through the double layer of the Peltex and then fastened in place. This somewhat held the Peltex in place but I thought it needed to be a bit better. So I turned the bag wrong side out

again and tacked the Peltex to the seams.

I trimmed away all Peltex from the seam allowances, this helps the SA to lay flat. Also, a welt piping foot or piping foot would be a great help in constructing this bag.


Fabric: A houndstooth quilting cotton.

Conclusion: I love my bag, it has been reunited with the Sophia bag at my friend’s quilt shop. She tells me people are commenting on them all the time. Now I have to get my hubby to take me somewhere, I have luggage will travel.


Wednesday, November 19, 2008

New Dress

Back here I made New Look 6823 in fantastic fabric. On Sunday, I made the dress again in a sweater knit from Joann's.


This fabric doesn't make the statement the first one did but will be perfect with black boots on December 20th for oldest daughter's college graduation. Here is the neckline, I used a different view.


Full length, I should have taken the picture outside.


I finished the Weekender bag today, will get pictures tomorrow.


Closing shot, youngest daughter is posing like a model, cute picture.


The twins and I went to the mall on Saturday. They tried on clothing for Christmas ideas and I took pictures of the things they liked. We printed off the picture then added the store name and sizes to the picture. We thought this might make shopping a bit easier for family.

Monday, November 17, 2008

Franzi Vest

Pattern Review

Pattern:
Burda Style Franzi vest. Dowload it Burda Style

Description: Short, trendy vest with lapels, faux pockets and back waist belt.

Sizing: Size 34 to 44, I made a 38.

Instructions: The instructions are very clear and the diagrams helpful. My only cause for confusion was the interfacing, did it call to interface the entire vest? Only the front? I wasn’t sure and I knew I would need interfacing for the buttonholes so I added interfacing in the front only.

The vest has a unique construction for the lining, Burda Style’s instruction are very easy to understand and by following these instructions you get a wonderful lined garment.

Likes/Dislikes: I liked the look and I loved the fact this vest was free, yes, I said free! Another like, the pattern is available right at your fingertips, no trip to a store, no waiting for a package to arrive in the mail, the only wait is the time it takes to print out the pattern. Taping the pattern together is very easy, too. Give it a try, the Franzi vest is a perfect pattern to try Burda Style’s pattern.

My only dislike is the vest is a bit short and the pattern had no lengthen/shorten lines. This is an alteration you will have to add.

Changes: I did not fold back the lapel, my lining was cheap and unimpressive. With this change, I added one more button to the front.


Also, I could not find a buckle for the back of the vest. I used two smaller buttons.


Fabric: A pinstripe from Fashionista Fabrics.

Conclusion: A great pattern that goes together quickly and with wonderful results. If you have not tried a Burda Style pattern, this is a great one to test the waters. Also, it is a sewalong on the Sew Forth Now Podcast please take a listen to the podcast and join in. I have set up a Flickr Group for the sewalong.


Sunday, November 16, 2008

BWOF 10/2008 #114


Pattern Review

Pattern: BWOF 10/2008 #114

Description: From magazine: "Clever front gathering will really make waves, the raised waistline providing a slimming effect

Sizing: 36-44, I made a 38

Instructions: They were very good for BWOF, just take it step-by-step.

Likes/Dislikes: I liked the look, the sleeves and the front gathering. Another nice feature is the darts in the lower back, helps with the fit of the top.


The dislike – it does run big and if I would have checked Pattern Review first I would have known this.

Changes: I lengthened the top and sleeves. I sewed the center front of the bodice higher, didn’t want the BWOF’s low cleavage look!

Fabric: A knit from Fashionista Fabrics

Conclusion: A cute, trendy top. I will probably make it one more time but I am first going to see how much I wear this one.


This is what I saw outside my window early one morning this week, I grabbed my camera, monopod and went out on the front porch. PJ's and bare feet - it was worth the cold, such a beautiful sunrise.


Saturday, November 15, 2008

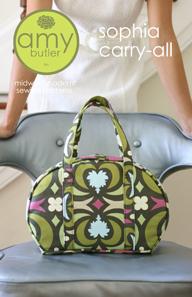
The Sophia Bag


Pattern Review
Pattern: Amy Butler’s Sophia Bag
Description: Inspired by romantic travel films of the early 60s. Stroll around town with this comfortably sized carry-all

Sizing: One Size

Instructions: The instructions are very thorough and helpful. Be sure to read each and every step, I know this from experience. I hand sewed the lining around the zipper and looked at the inside of my bag. Something wasn’t right, the lining was hanging down to far. I went back and checked the instructions, I left out a step, tacking the lining seam to the bag seam. So I unsewed, tacked the lining and the hand stitched the lining again.

Likes/Dislikes: I really like the look and the shape of this bag, it is so timeless. I also like the long zipper, that helps in getting into the bag.

The only dislike, I want to make several for Christmas gifts, but I am not sure I will have time. This bag does take some time to cut out, fuse the interfacing and construct. I think I at least 6 hours in this bag.

Changes: I did make several changes:

The main change was substituting Peltex for fusible fleece on the side panels and the edge panels (the panel below the zipper). I wanted a stiffer bag than the fusible would present and the Peltex seemed like the best solution. It was, I am quite pleased on how the bag holds it shape. I did trim away the extra Peltex from the seam allowance.


Another change, I used plastic canvas in the bottom of the bag and used bag feet. I read this on a blog and it was a great idea.

Thanks to the reviews on Pattern Review, I left off the piping at the bottom, much easier to sew.

Also, I added a pocket to one side between the handles. You need an outside pocket, right?


Fabric: I wanted a quilting cotton that was timeless as the bag. Also, I didn’t want a trendy fabric that would go out-of-style. Too much work is put into this bag for it to be so last year quickly!

If you plan on making the Sophia bag, and you should it is a great bag, pick out your zipper first. It is a 22” purse zipper and the color selection is limited. If you pick out a fabric with a unique color scheme you may not be able to find a zipper to match.

Conclusion: A wonderful bag with a fabulous shape. Amy Butler designed such a winner here. I cut out the Weekender yesterday so I could have houndstooth luggage set.

Oh, yes, invest in a piping foot or a welt piping foot? That will aid in the construction of this bag, the piping fits right into the groove and you can guide all these layers much easier.

BTW, if you have the Weekender pattern, can you look on the back and tell me what pattern is in the SUV? I think it was one of Amy Butler’s first patterns, the duffel or something like that? I would like to find a copy and make that so I would have a 3-piece houndstooth set

Friday, November 14, 2008

I Have Been Sewing

Here are a few pictures of part of my sewing this past week. I will post individual posts and reviews for each item, probably one post per day for 4 days. Very scientific, right!

First, Amy Butler's Sophia Bag. I can't even begin to say enough great things about this bag. It is wonderful all around. I will tell you all about the construction and my changes tomorrow. I go to my friend's quilt shop on Friday afternoons after work and cut out large projects. She has this huge cutting table, 4' x 8' probably, I cut out the Sophia last Friday and I cut out Amy Butler's Weekender Bag today. It is so fun to visit with my friend and we do something sewing related. She cut out her Sophia today.


Some crafting but not great pictures - A cupcake pincushion, pattern by Sandi Henderson. I will take better pictures for my review post.


BWOF #114, 10/2008, this is a great top.


Now if you want to sew-a-long, head to Episode 38 of the Sew Forth Now podcast and join. We are making the Franzi vest from Burda Style website. I hope there are others participating. One thing for sure, I will be using Burda Style for a pattern resource more often, this was very easy to print and put together. More details later.


That is just what I remembered to take pictures. The following is a complete list:


  • 6 potholders and 6 notecards for a swap

  • Put binding on Meredith's quilt which just came back from the machine quilter

  • Helped Meredith make 4 placemats for Christmas

  • Helped Meredith make a clock from Pretty Little Patchwork

  • Cut out fabric from Meredith to make another quilt, she has the blocks sewn together and is ready to set the blocks together. She will be doing that tomorrow, the quilt has to go to the quilter on Monday.

  • Bought some fabric and I am prewashing it right now.

Up next, a BWOF trench coat.


Sunday, November 02, 2008

Fall Color

Today has been a busy, busy day and right now I am taking full advantage of the fall back for the time change!!
The twins helped me clean up the flowers and the yard, so I rewarded them by a fall picnic. Not many November 1st around here are 70 degrees. We drove about 15 miles to a historic covered bridge. Here is the view from our picnic spot.


Thanks to some local citizens the bridge was saved during the floods in July. These brave people went on the bridge and removed some of the siding. Why? Well, the creek was so flooded the water was as high as the bridge, even a foot or two above the bottom of the bridge. With the siding removed, the water was able to flow through the bridge, thus saving the bridge. A bridge in the same area (over 100 years old) was not so fortunate. This picture will give you an idea of how high the water was.


Another picture of some fall color:


The rest of my day? Out to dinner with some girlfriends and a trip to Joann's with them. They got a huge laugh at this, as none of them sew but one friend wanted home dec fabric to recover dining room chairs. I had to figure the yardage!

Back home by 8 and I went to scrapbooking. A couple of days ago, I spread it out all over the dining room table. Tonight I have all the pictures in the album and have a bit of journaling to do. February to June are all in the album, now to print off more pictures. I did make an 8 x 8 album just of dd #2's graduation.

Saturday, November 01, 2008

The Lining

Snapped a few quick pictures of the lining before I headed out for the day. Unfortunately, I am not wearing the coat today, temperatures are going to be almost 70. That is a good day, to spend getting my flower garden ready for winter. I told the twins they were helping, boy, were they thrilled!!