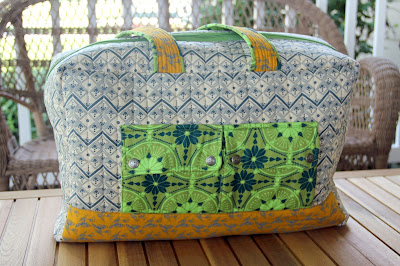
The pattern is Cargo Duffle by Noodlehead (free by the way) with just some changes in size. I am putting up lots of pictures for this bag, I just love it. The shape and size are perfect for loading up baby things.
I did use Soft and Stable for the stabilizer and it is just perfect for any bag, it really holds the shape. The handles also have the soft and stable, inserted after the handles are made and turned right side out.. Speaking of the handles, I made mine longer and narrower, reducing the suggested size by 1". The straps are 27" long. Originally, I made the straps as per the pattern. After having the bag completed except for binding the interior seams, I just wasn't happy with the handles. They were too wide and too short for this bigger bag I had made. The new size is so much better and I am quite happy I made the change.
The front and back pieces are 13 tall x 19 high, bottom gusset is 8" wide by 33.5". Note: the gusset has to be made longer since I made the front and back pieces taller. I added 1.5" to the height, so, 3" needed to be added to the length of the gusset. The zipper gusset is half the width of the bottom gusset, with the changes mine is 4" wide by 30.5" long.
If you had a longer zipper (recommended is 26"), you can always make the zipper gusset longer.
My zipper was not long enough for the zipper gusset, so I just added a nice tab to each side.
I did the binding to all the interior seams for a nice finished interior. I wanted a hard bottom for the bag, plexi glass is a nice material to do this. My local lumber yard will cut this and I just measured the bottom of the bag seam to seam (width and length). The edges were a bit rough so I used duct tape to seal the edges. I just made a liner (think like a pillow case) and inserted the plexi glass. I am going back to all the Weekender bags I made and adding plexi glass to the bottom. It is incredible how this helps the bag to hold its shape.
After the bag, was finished I had to fill it up, right? First a travel size diaper wipe pouch, I had purchased a pattern on Etsy and made a couple a couple years back. Well, I couldn't find the pattern and wanted to just get this project completed before the wedding. So I winged it
The back has a pocket to insert a diaper or two. Erin loved this pouch to slip into your purse and not have to carry the big diaper bag.
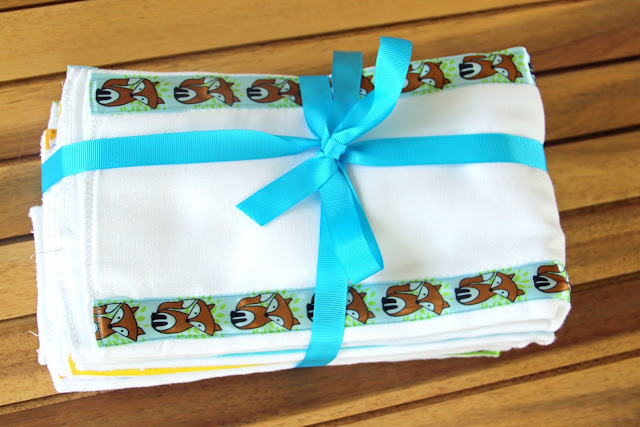
Next every diaper bag needs some burp cloths, these are just cloth diapers with some ribbon added. A nice stack for the new baby, which everything is gender neutral, we do not know the sex of the baby.

Then four quilted bibs if baby is a girl, one extra using the leftover bag fabric.


Your bags always look so professional. And a very nice gift.
ReplyDeleteThank you, I do like making bags.
DeleteThank you for such a detailed post! This bag and all it's goodies will be perfect for the new baby and his/her parents!
ReplyDeleteThanks, sometimes it is all in the details. I cannot wait for this little bundle of joy to arrive.
DeleteYou make the best baby stuff! This is an awesome gift!
ReplyDeleteThanks, Carolyn, baby stuff is so fun.
DeleteIt's really cute. It looks great. Love the little extra's you made to put in the bag.
ReplyDeleteThanks, it was fun to fill the bag up.
DeleteLove all your goodies. Your wipe/diaper piece is so much cuter than the one I made. I bought a pattern but yours is cuter . Love it all !!
ReplyDeleteThanks, Mary Ellen. I just kind of went with this one and it worked fine. Not sure the next one will!
DeleteI love the blue and cream zig zag fabric on the bag! Is that Anna Marie Hoerner fabric? I am on a blue kick lately and would love that one. We are using a new thing called In R Form by Bosal. It is like Soft and Stable, kind of like the old headliner foam in cars. It comes regular and fusible. It really makes bags look professional. Nice job!
ReplyDeletethanks, Patricia, I think that is AMH fabric but not positive. I will check out the R Form, thanks for the information.
DeleteVery nice bag and what treasures you tucked inside. She must be a special friend, indeed.
ReplyDeleteThanks, she is a great friend for many years.
DeleteI really like this bag and appreciate all your details. Just so I understand, you quilted the outer fabric, soft & stable, and lining together and then put binding on the inner seams? Thanks.
ReplyDeleteYes that is correct - cutting it a bit bigger, then quilting and after trimming to correct size. The quilting will draw the fabric up a bit.
DeleteWhat a beautiful bag! It's so gorgeous! What a thoughtful gift!
ReplyDelete