Wednesday, April 27, 2011

Butterick 5313

I mentioned this project way back on March 2nd and on Easter Meredith wore it.

Only had a good group picture of her, so I cropped the rest of the sisters and cousins out!  Click on it for a bigger view.

Added a review here

Monday, April 25, 2011

Butterick 5327 view A

I made view C for myself and here is the original blogpost.  Today I made View A, the one with the tucks and beads.

I used a wonderful rayon knit from Gorgeous Fabrics and made an XS for Meredith.

Some hints and tips
  1. Purchase your beading first, the pattern envelope states 7/8" to 1" beads.  I found mine in the jewelry section and make sure they are lightweight.  There is alot of beads on the neckline and you don't want the beads to pull the neckline down.  Also, I did beads the entire front neckline, just liked how it looked. 
  2. The tucks on the front are sewn by hand.  I used the marks on the pattern tissue as a guide to begin.  The instructions have you make 3 small tucks together.  I used a bead to space the grouping of three tucks, then the bead fit perfectly when I went back and stitched them to the garment.
  3. I am going to wash this in the hand wash cycle and hang to dry.  I will keep my fingers crossed on how the beads old up.
The only thing that takes the time on this garment is the tucks and beads since it is all handsewing but it is so worth the time.

A unique and very RTW like garment for Meredith.


My Easter Outfit

Hope everyone had a very Happy Easter.

Thought I would share what I wore for Easter, Simplicity 2250 jacket.

Saturday, April 23, 2011

Craft Room ReDo

As our girls grow up and move out of the house for their own homes and careers, we are finding ourselves with more room.  My second oldest daughter has moved out and will graduate in May and has a job as a secondary math teacher in the fall.  She will be living in our town, which means her room did not have to remain a guest room.  I changed it into a craft room (mainly a scrapbooking room with hopes of the sewing area moving into this room someday).

I set it up temporarily and it was a mess in these pictures


The wall across from desk

bookcase wall

window

from door

The changes:
  1. New paint - Valspar Silver Leaf
  2. I made curtains from  quilting fabric
  3. wall art made from Silhouette, frames and old anitque piece
  4. Purchased a drop leaf table to expand my work area
  5. Updated a lamp shade
  6. Removed the carpeting, parquet floor underneath
  7. Added jars, baskets and more for storage
Here is the bookcase, this is my daughter's piece of furniture and will be moving to her classroom in the summer.  I plan on finding a bookcase to replace it, something a bit taller.
    Bookcase wall
     The parquet floor isn't in the best shape but so much better than the old carpet.  I used mop-n-glo floor wax (2 coats) and the floor looks much better.
    View from the doorway
    The glass L-shape desk was in Meredith's room but we moved it to this room and now we can both scrapbook and make cards with all the desk area.  One drop-leaf of the table is up and I can lift the other side for even more area. 
    Wider shot from the door
     I used some yellow quilting cotton and this tutorial from Dear Lillie to add some color to the room
    Corner of L-shape desk.  Vintage items for storage and updated lampshade.
     This storage piece was found at Sam's Club, I added vinyl so I would know the colors in each drawer. 
    Scrapbook storage
     My mom had this embroidered picture.  I made it for my Grandfather when I wasy 12 years old.  It is myself, my brother and my 5 other boy cousins, yes I was the only girl that generation. I erased the birthdates to protect our ages!!  I thought it a perfect addition to my craft room and so happy my mom kept it all the years, my grandfather has been gone 24 years.
    Picture I stitched many years ago
    I need to look at the flea markets for a few more jars for the ribbons but this is much better than all of them in one big basket.  Plus it looks nicer.
    Ribbon jars
     I bought this at a flea market and the yellow is just right for the room.
    vintage scale
     Used a vintage wooden piece (it was in the before picture) painted it yellow, added Dollar General frames with scrapbook paper, then the wording made from my Silhouette.  I plan on making a yellow and white quilt to hang on the ladder.
    wall opposite of the desk
I am so pleased with the transformation.  I find I am a much neater crafter since the room looks so much better and I have improved the storage.

Sharing this on:
Tatertots and Jello

Friday, April 22, 2011

Simplicity 2250

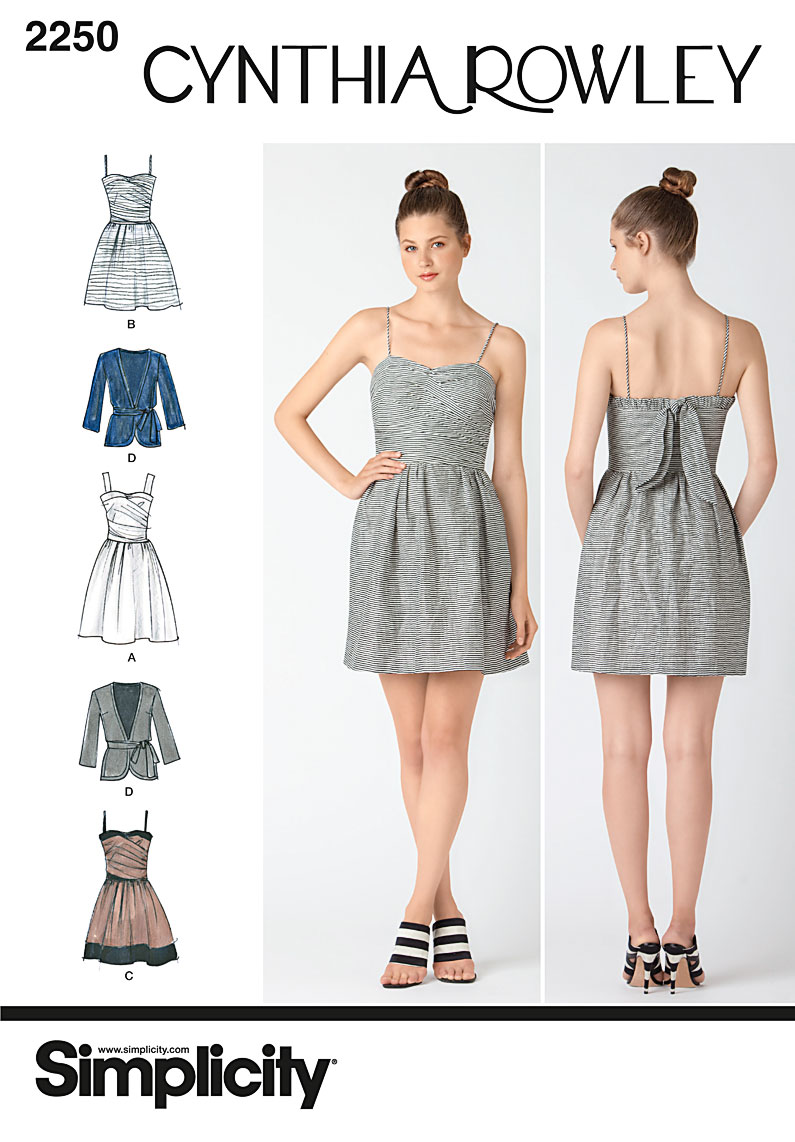
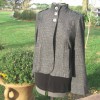
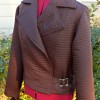
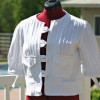
Description: Simple summer three quarter sleeve jacket.


Sizing: 6 to 22,

Instructions:  The construction of this jacket is pretty easy and the instructions were pretty straightforward.  I thought the infomation for the bias binding was nice.  They included a pattern piece for the binding so you could sew one seam and then cut a continuous strip.  I did not follow this method, just used the pattern piece for width and then cut my own strips then sewed the binding.

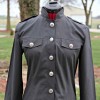
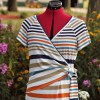
Likes/Dislikes: I initially purchased this pattern for the dress for my 16 year old daughter.  After looking over the pattern a bit more, I decided I needed a jacket from this pattern.  I liked the simple lines, the binding and the belt (which I did not make)

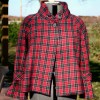
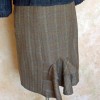
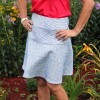
I also liked how the front facing covers the seam allowance (front and side front seam) to give a nice clean finish on the wrong side, hard to tell much detail in this picture:

Fabric: Seersucker

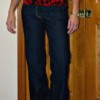
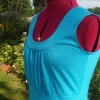
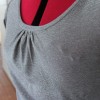
Changes:  No shoulder pads, added 1" to the length and used Steam-a-Seam II to hold the binding in place on the wrong side before stitching in the ditch.  My main change was to sew my underarm seam, then clip it 5" from the bottom of the seam.  I finished the top of the seam with my serger and the bottom 5" used a french seam, so I could roll up the sleeves.

French seam
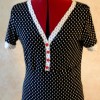
Note the dart in the front of this jacket is very small so some alterations might be needed here


Conclusion: Very fun and quick jacket but stylish all the same.  The hardes part is applying the binding.


Wednesday, April 20, 2011

Updated Bookcases

Sewing has been slow around here - too many track meets and a nice abcessed tooth for me.

I have my Cynthia Rowley jacket finished and pictures will be soon (another track meet tomorrow)

I did finish updating my bookcase in the family room before my tooth started pounding with pain (not that bad but the past weekend sure wasn't too fun).

The before picture with one shelf changed:


After, it is a nice change for spring and summer.  I am enjoying the bit of color.

I used foam core board in the back of the shelves and just wrapped quilting cotton around it. 

Gallery - Projects


****

***