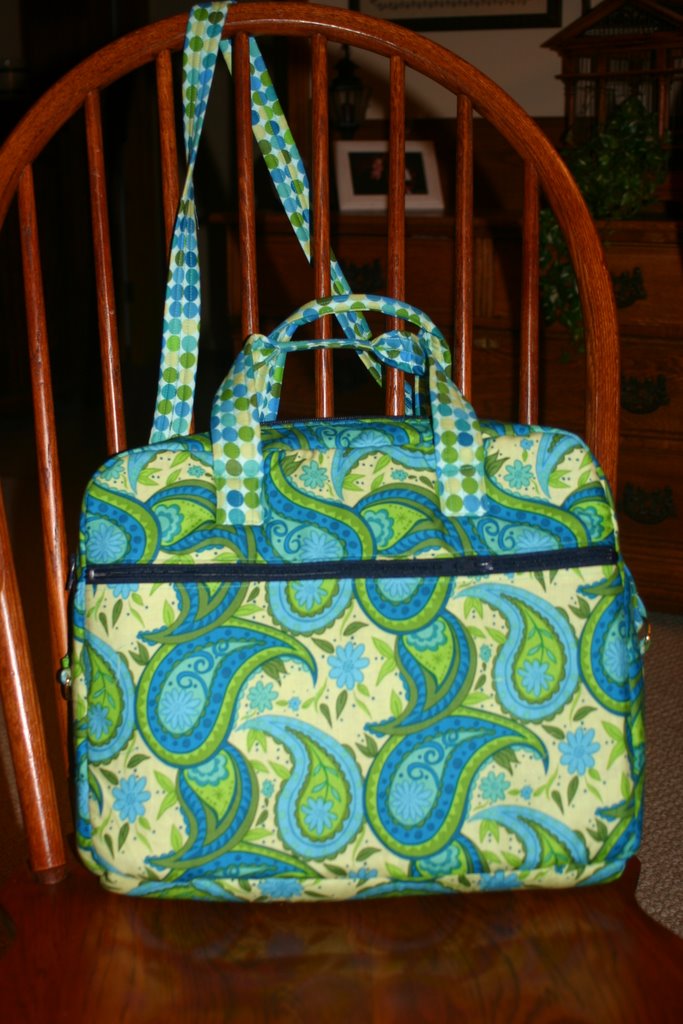
After several days of bits of sewing, I have finally finished my laptop tote, Hi-Tech Tote by Indygo Junction. It turned out better than I imagined and I am so very pleased with it. I am planning to make another one for a Christmas present. When I am constructing Hi-Tech Tote #2, I will make some changes. Here they are if anyone is considering making this one. Note: Blogger is not cooperating to load more than 2 pictures, I will edit sometime tomorrow. Drats, had all these plans for this post and my multitude of pictures.
- Move the D rings on the side up, the bag isn't that steady on my shoulder, wants to wobble back and forth. My side looks like the picture but I think the D ring right below the zipper would be better. Here is a picture:

- Consider the color of the zipper before buying the fabric. The pattern calls for a 22" sports zipper and an 18" sports zipper. These are limited colors so the zipper might be the determining factor in the fabric choice. Me? I had the fabric first, the navy looks fine, I think.
- I did this change during construction. The pattern has you put the lining fabric wrong side up, then the 1/2" upholstery foam, then the outside fabric right side up. All unfinished edges are to be serged. Well, this not so nice looking serging shows from the inside. I decided to cut 1-1/2" strips of fabric. I sewed it down on one side of the serged seam, then wrapped it around the seam and hand stitched it down. Here is a picture of the serged seam and the wrapped seam:
- For the bottom, I hand stitched the raw seams to the bottom of the bag. Then I measured the bottom of the bag, cut a piece of Timtex this size, covered it with a fabric piece. This was then stitched down to the bottom of the bag. Ta-da a much nicer inside of the bag.
- I bought the required amounts of fabric as stated on the materials needed, there is very little left. I would have liked to make the padded wrap for the laptop but I will need to do some patchwork or order more fabric.
- It is diffult sewing the upholstery foam "sandwich", Indygo Junction recommends using clothes pins to hold the "sandwich" together. I wonder about sewing 3 of the sides with the 1/2" SA, inserting the foam and then sewing the last seam. Sounds like it would work. I was using my dd's very basic Pfaff Smart machine and the needle position does not adjust. My Viking is in for cleaning and a few minor repairs, boy did I miss that adjustable needle position.
Now for the likes of this bag:
- The zipper pocket (as seen in the first picture)
- The divided side pocket
- The attention to detail by Indygo Junction.
- The padded sides, bottom, front and back. A very sturdy tote for your laptop.
- The cute details: piping, the short handles and the general look of the bag.
This was a fun project that took some thought and time but was so very worth it.