Sunday, July 31, 2011

Our Vacation

Our vacation was to Niagra Falls area and you talk about a beautiful area.

We enjoyed the falls:
American Falls

Canadian Falls
Our family at the falls
We also visited the Niagra Botanical Gardens, this was so amazing.


me in the garden


Mike and I in front of Niagra River

Meredith popping into the picture
Then we went to Fort Niagra that is around Lewiston, NY

Add lots of sightseeing around Niagra-on-the-Lake, watching ships go through the Welland Canal and taking a boat ride down the Erie Canal.

We finished our trip at Gettysburg, PA and toured the Battle of Gettysburg grounds

This is at the Soldier's Cementary, Abraham Lincoln's Gettysburg Address


Just a wonderful trip with seeing part of this country I had never seen before and visiting Canada for the first time.

Saturday, July 30, 2011

Meeting Friends

Hubby, the twins and myself have been on vacation, a wonderful vacation.  I will share pictures tomorrow but today I want to talk about meeting friends.  Lynne and I have become great sewing internet friends.  Leaving comments on each other blogs, emailing about RTWgarments  (Cabi mostly) and how we can recreate, sharing highs and lows in our lifes and just becoming great friends with alot in common.

Last Wednesday was a wonderful highlight to the vacation as my family went to Lynne's house for dinner.  My family said are you sure this is the house?  I said, "yes, they have been painting it and this is the exact house from a  picture from her blog!"  My family was amazed, I think.

From the moment, I walked onto Lynne's porch it was pure joy and fun for the entire evening.  We chatted, I toured her beautiful home (and sewing room), sat in her garden and talked sewing and had the best meal of the trip. Toward the end of the evening, we took pictures and laughed and giggled.  . 


A good laugh shared by friends.

Thank you so much, Lynn and JR.

Thursday, July 21, 2011

Patience

Is not what my Kaitlyn has (at least for modeling the skirt I made her).  I used the same tutorial from my eyelet skirt.  I did put elastic through the entire waistband on this skirt.  The waistband I cut 8" larger than their waist measurement, this allowed room to pull the skirt over the hips.

I was allowed one picture, so the quality isn't the best and she left her athletic shorts on, just pulling the skirt over them!
then Mom really pushed her patience and had her model Meredith's skirt!

this is the same fabric leftover from my skirt, Meredith chose the shinier side.

Quickest picture session ever.

Wednesday, July 20, 2011

New Quilt - Make Life Sweet Fabric

I made this quilt a few months ago, finally sent it to the longarm quilter and just finished sewing on the binding.
All the fabric but the cream with dots is Make Life by Sweetwater


I made some blocks from a tutorial online and then got tired of making them all the same so I just started making my own blocks.


Monday, July 18, 2011

Sew Serendipity Multi Fabric Skirt

Have you seen or purchased this book?
I had  a copy of the book, gave it away on the podcast, then got another book (Thank you, Kay).
After seeing, Lynne's darling version, I had to make one for myself!

Description: The multi-fabric skirt uses a combindation of five coordinating fabric prints.  Pocket with ruffle details, piping or rick-rack or ruffle option in front seams, ruffle at hem, faced waistband and invisible zipper.

Sizing : XXS to XXL with size chart provided.  Full size tissue pattern pieces are included in an envelope in the back of the book.  I cut out a medium but took some in on the side seams.  Next time I will cut out between the small and medium. 

Instructions:  They are very easy to follow.  Kay Whitt has the book organized into chapters for each garment type.  Chapter one is skirts and at the beginning of the chapter is instructions and illustrations for the basic skirt.  In the skirt chapter, there are six different skirt variations, each one having specific instructions and illustrations for that type. 

I like how Kay Whitt has you add so much detail with edge and topstitching.  It really finishes the garment.  You can see all her construction details at this tutorial available on her blog.  It details the ruffled skirt on page 58 of the book and adds pockets.  Several steps are the same on all the skirt, making this a perfect tutorial for your skirt sewing.

Also, Kay illustrates in the book how to press the ruffles on the garments.  She states pressing the ruffles flat makes a closer fit to the body for a complimentary appearance (page 21)

The book includes, dresses, tunics and jackets.

Likes/dislikes:  The fit is the first very big like.  The skirt fits perfectly and as Lynne pointed out, several seams to help adjust the fit.  I also, like the style and shape.  I am drawn to the color and texture of quilting cottons and this is a fun way to use those cottons.  The illustrations, photography and instructions in the book are superb.

Fabric:  cottons from Joel Dewbery and Oliver & S. (moda)

Changes:  I added another pocket and used a smaller ruffle for the bottom ruffle piece.  With the design and all the skirt variations in her book, you can really change the look of the skirt each time you make it.

Conclusion:  I really like my new summer skirt, it is just plain fun.  The fit is perfect and I will be using the pattern for all types of fabric.  Her tips and hints throughout the book are very helpful and aid in such a successful garment.


To go along with this post:

I just interviewed Kay Whitt for the podcast, Episode 69, check  out the blog for details and listen to the podcast here via itunes or here at a direct download at libsyn (takes a bit to download) or go to iTunes, search "Sew Forth Now" in the iTunes store. 

Saturday, July 16, 2011

Kwik Sew 2845

This pattern has been on my to do list for quite some time. Belinda made it back in 2009 and her versions are beautiful.  Then there are Gigi's versions, also gorgeous.

It has taken me awhile but finally I have made this top.  I thought about it again after Lynne made a skirt from Sew Serendipity book and wanted suggestions for tops.  I dug out this pattern as a possibility for her and decided it was time to make one for me.

Pattern Description: Misses' knit tops. View A and B sleeveless, tank style tops with ribbon in casing that gathers the front neckline. View B has empire waist on front with elastic in casing. View C is a peasant style stop with short raglan sleeves and elastic in the neckline and armholes. I made view B with sleeves from another pattern

Pattern Sizing: XS to XL

Fabric: A stretch rayon from fabric.com, ordered it after Lynne used it for a cute anthro-inspired top for herself.


Likes/Dislikes:  I never was drawn to this pattern until I saw the variations out there on the internet.  Then I quickly ordered the pattern.   Adding the sleeves to this pattern made all the difference in me liking this one.
Another like is the peasant look without all the fullness

Changes: I added 1" to the bodice.  The sleeves are from Jalie 2787.  Several of my other changes are the ones Belinda wrote in her review.  These include adding a CF seam to the bodice for the ties, eliminating the buttonhole.  Added to the shoulders for the sleeves.  Also, added 1" to the hem for length.

My tie is self-fabric but I used a piece of 1/4" elastic (cut an inch shorter than the back), sewing a self-fabric tie to each end of the elastic.  I threaded this into the neck casing and stitched in the ditch so the elastic was in the back casing. 

Conclusion: A fun top, with great design, probably a new favorite of mine.  I will add another inch or two to the length.


Thursday, July 14, 2011

Lemons to Lemonade - Quilt

Meredith picked out some fabric to make a very cute quilt (pattern purchased online).  I cut all the strips for her and the blocks.  She began sewing and we realized the blocks were only going to be 3" square, quite small and she would need several to make a quilt of any size.  Not giving up, Meredith kept at it and stitched some rows together but some blocks had some bias.  With the bias and small size in mind, the blocks were not matching up.  I told her not to worry about it, we would cut new strips and blocks in a much larger size.  I took the strips she had sewn together and made a baby quilt.  Now we have a very cute baby girl quilt all ready and waiting when we need a gift.


Wednesday, July 13, 2011

Simplicity 4076 (again I know)

I will have to count up the number of times I have used this pattern, it is one of my favorites for knit shirts.
Lynne and have been emailing about some RTW garments, she had some great ideas for pattern suggestions.  For a top on the Cabi site, she suggested Simplicity 4076
I used the crossover view but changed it so both sides had the ruching.  This is such a quick top to make.  Here it is

close-up of gathers

what happens when you are hurrying before self-timer goes off, oops


A couple of shots from the garden

Tuesday, July 12, 2011

BWOF 2/2005 #132

It all started with this piece of fabric from fabric.com


I thought a new dress for me would be just the garment for this fabric.  Well, it did become a dress but for Erin not me!


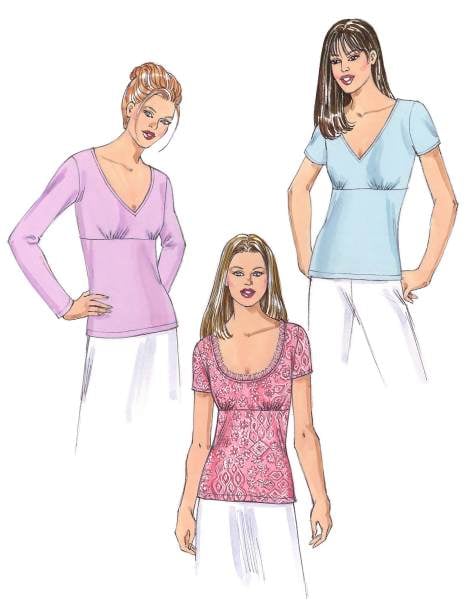
Description: Slim, elbow-length sleeves, bands along the center front seam and a plunging v-neckline underscore the slim line of the dress.  The tie-bands are caught into the side seams.

Sizing: 38 to 46, I made a 38

Instructions:  Once I got past the instructions for the band, it was pretty traditional dress sewing.
I did not have enough of the floral fabric for the bands and used some knit I had recently ordered from Needle Nook Fabric. 

The bands were interfaced with Fashion Sewing Supply interfacing and then the right sides are matched with the wrong side of the bodice  then stitch the seam

Next turn the bands to the right side and press.  I used some steam-a-seam II to keep the turned edge of the band to the bodice for topstitching
I topstitched the neck edge about 1/4" and the folded under edge of the band was edgestitched


Next you put in the invisible zipper and I used Amanda's tutorial to help have a very successful invisible zipper (thanks Amanda for a great tutorial)

a hook and eye was added later.  The back band is sewn the same way the front band is constructed.
Next, Burda has you sew the shoulder seams.  As I was constructing the back bands, I pinned the shoulder seams together to make sure I had bands the same width.

After that, you sew the side seams, inset the sleeves, hem and you are done.

Likes/Dislikes:  I thought this was a very classic and timeless design.  Especially since my BWOF magazine was 6 years old.

the dislike - the dress looked horrible on me.  Also, the torquoise in the fabric ran a bit in the wash.  You can see this in the above picture.  After completing the dress, I put some Shout on these spots and that seemed to help quite a bit.


Changes:  None to the dress pattern at all.

Conclusion:  All was not lost when I realized this dress wasn't suited for me but would be perfect on Erin.  She was out today picking up some things and the dress was on the dressform.  I had told her about a new dress coming her way and she said, Is, that the dress?  I nodded yes and she said what a cute dress.
The v-neck is low but she will wear a cami with the dress.  If I had kept it I would have put an inset of fabric to cover the deep v-neck.

Note on the tie, since it is sewn in the side seams, you can tie it in the front or in the back depending on the what look you want.

Here is the dress:

I am very please on my zipper and how well the bands line up

Sunday, July 10, 2011

Simplicity 2599 - White Knit

This pattern is a Best of 2010 on Pattern Review and I can see why, it is very versatile
I made this in August 2010 and here is the review and the original blog post

I was Cabi-inspired again with this white top:

Photo from Cabi Canary

I called my friend, Anne at Needle Nook Fabric and asked her for a white knit, something substantial, so I could wear it alone if needed.  She had just the fabric and by the time we finished talking, I had a nice box coming my way (you know, I like my knit fabric)

Since this Simplicity pattern is for a woven, I had to make some adjustments
  1. I folded out the dart on the pattern
  2. cut it a bit smaller in waist and hips
  3. added some length (not due to the knit but felt my first top needed some length)
  4. Cut the back on the center fold, I did not need the keyhole opening for a knit
I used the ruffles from view D first.  When I cut these the first time (crosswise) the knit kept wanting to curl on the bottom of the ruffles.  I didn't need to worry about the stretch on the ruffles, so I cut these lengthwise.  This solved the curling problem and only if you are very close to the garment can you tell the difference. 

Next came the neck ruffle from View E and then a bit of finishing.

I wore it to work like this:
but soon wore it like this at work, just too hot in the building


I cropped a photo of the ruffles, the details can be seen a bit better.  Clarity isn't the best


Kwik Sew 3419 with some changes

Another TNT pattern, I made it here and that is probably my all time favorite top and it is due to the fabric.  You can read my pattern review  and it has links to the four previous tops I have made.  The best feeling knit and it was a dream to sew.  I emailed Anne of Needle Nook with that link and ask her if she had some more of that fabric.  She sent a picture of several bolts and I picked several fabrics.  For this top, I used an aqua knit, talk about soft.

This time I wanted the bottom of the top to have some gathering.  On  the Cabi site, it has several versions of the gathered top.  I added 11" to the bottom front and gathered it to the back, the gathering stops at the bottom 2" to allow for hemming.


close up of gathering